How to Add a Keyframe in After Effects
Introduction to KeyFrames in After Effects
Adobe after effects has been the most used software for Video and VFX editing for movie titles, motion graphics and compositing for all post-production work of television and movie making. Today we are going to see one of the important features of the application, which is keyframes. Keyframes are used for setting limits or parameters to the content, such as motion, audio, effects and many other properties. Changing from one scene to others in the video. There are, by default, 2 keys upon loading into after effects, one at the start and the other at the end for the change. Below we are going to see more details and usage of keyframes in After Effects.
How to Add KeyFrames in After Effects?
Working on keyframes has been the basic fundamental usage for motion graphic editors.
- By using the"0" button from the keyboard, the preview can be seen. As per the below image, there are 2 keyframes at start and end, and the preview mode runs between them in given timelines to check from which timing the change is happening.

This helps in correcting the placing changes of effects, scenes or graphics exactly at the required time frame.
- A spacebar can be used to start and stop the preview. We can add keyframes to the transforms attribution of each layer in the project.
- Here we shall add keyframes to the following project. Keyframing helps in adding motion to the content in the frame. So here we are going to add motion to the Circle Educba logo.
- We have to first plan how to shout the layer move in your frame. For the demo, we are going to move the logo from the left to the right sides of the frame.
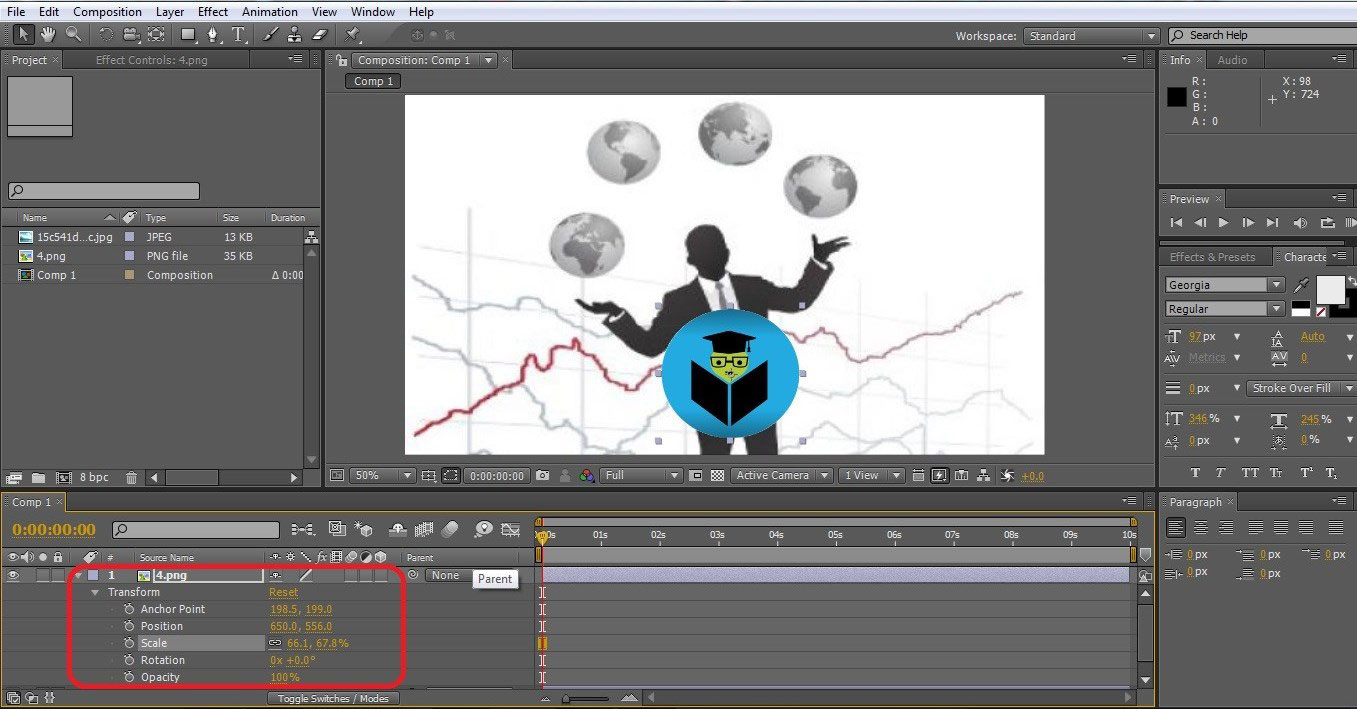
Step 1:Open After Effects and load all the layers to the layer pane to start keyframing. Open the transformation properties of the layer, which must be moved by clicking the small triangle beside the layer name. Check the available positioning options.

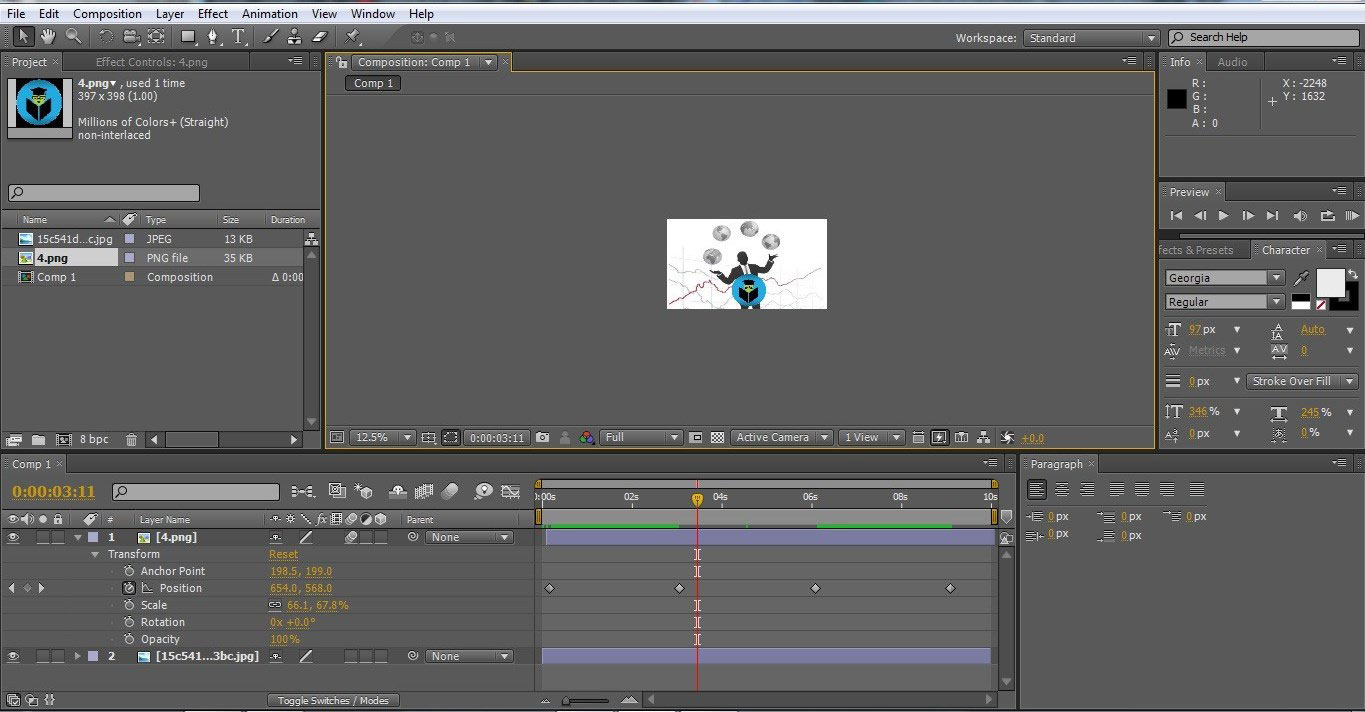
Step 2:As we are going to change the position of the logo. Move the logo top left corner out of the frame by selecting and dragging with the cursor. Click on the stopwatch symbol o beside position and click on the timeline within how many seconds we want our logo to reach the centre. The total time duration is 10 sec in the below example, and I want my logo to reach the centre in 3 secs.
![]()
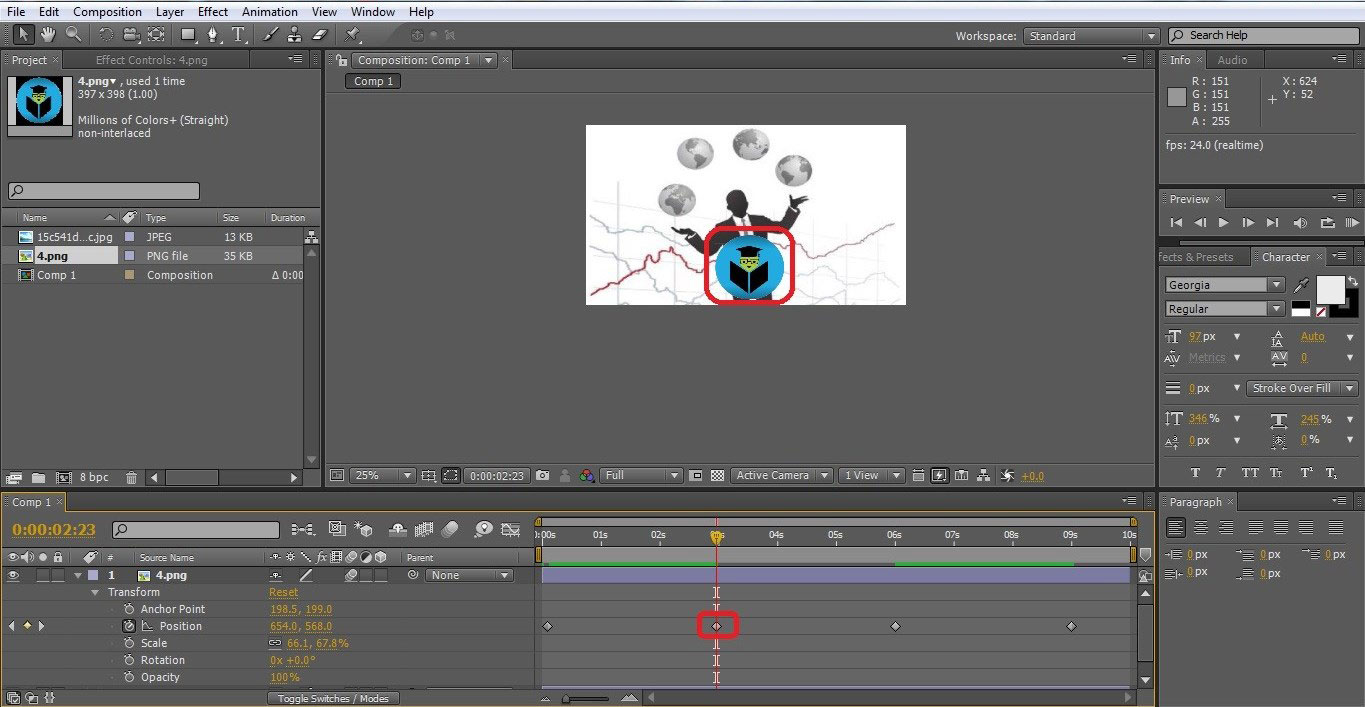
Step 3: Click on the 3-sec timeline and use Shift + Drag the logo to canter or to the location where it should have stayed for the next keyframe.
Step 4:As we have stopped dragging the icon until the centre, a new keyframe will be generated at the dropped location. Now we have a keyframe at 0 seconds and other at 3 sec plays the motion using the spacebar to check the speediness of the movement.
Step 5:Repeat the same for the last position of the key. Move the time liner to 9 sec and use shift + drag to move the logo from center to the right corner till out of the frame.
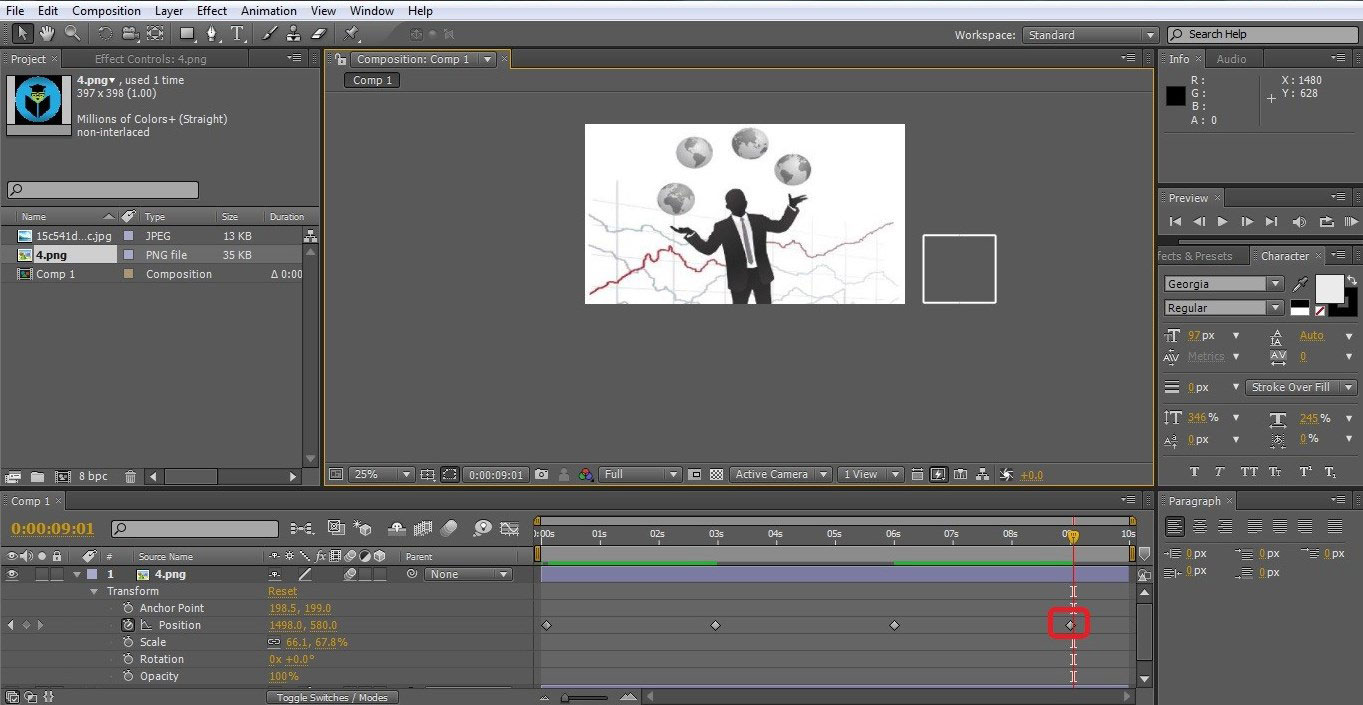
Step 6: When we play this, we can see that the logo will be moving fast from left to centre and slowly from the center to right that's because of the time duration of 0 to 3 seconds and 3 to 9 sec. We can even observe this in the linear motion movement of logo keys by dragging and selecting all the keys.
Step 7:To adjust the time gap, and logo must also not be continually movie as it needs to be the centre for some time, so let plan the logo to be in the centre from 3sec to 6sec so that the logo motion time or keyframe be as follows
- Left to centre: – 0 to 3 sec.
- In centre: – 3 to 6 sec.
- Centre to right: – 6 to 9sec.
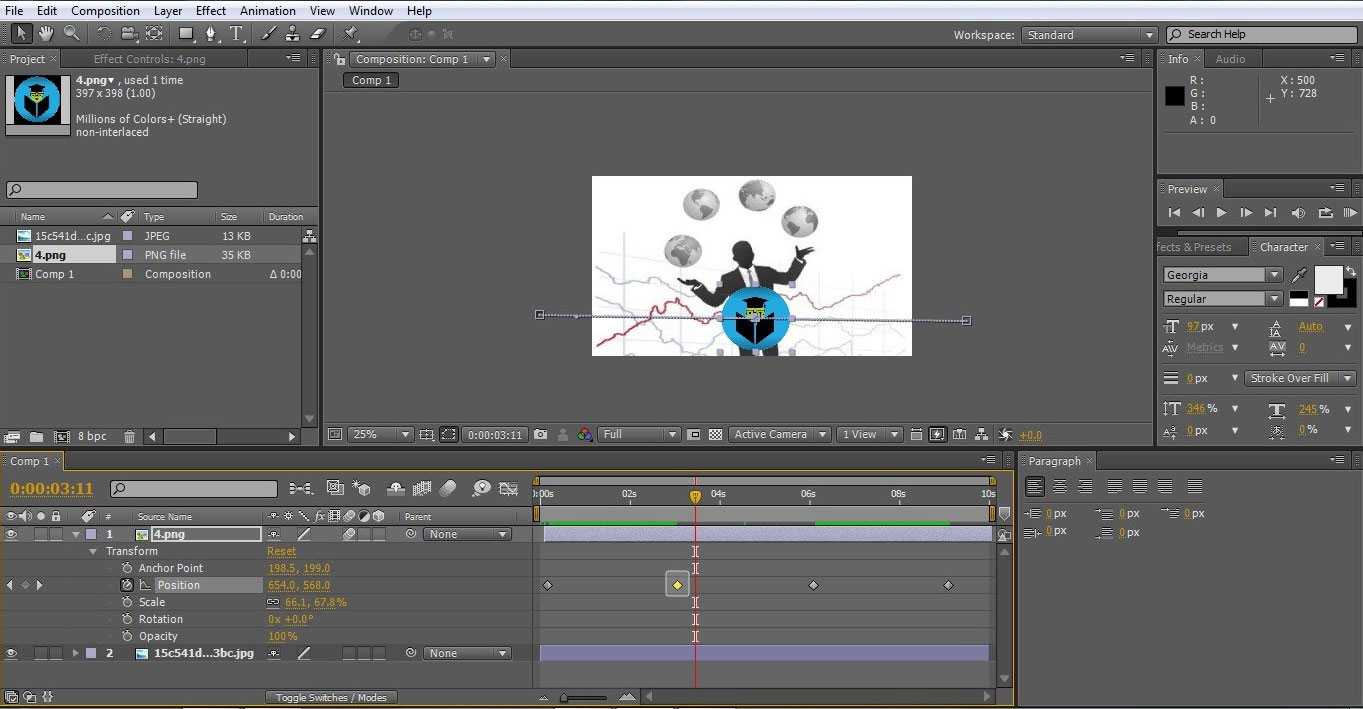
Step 8: Click on time linear 6 sec, and by dragging around the key at 3 seconds, we can see the key gets selected. Click Ctrl + C and Ctrl + V from the keyboard so that the logo stays in the center from 3 sec to 6 sec.
![]()
Here in this project, we have created 4 keyframes for the motion of the layer.
Step 9: If any other object also needs to be moved with the logo in the same path, then the other object can be parented to the logo layer. To enable the parent option, select layer from layer pane, which must be parented to the logo and click on parent icon, which is present beside none, as shown in the above image. Even by right-clicking on the layer pane, we find parenting option available.
![]()
Step 10:Adding motion to the moving layers is also important to get the look and feel of moving. The option is present in the layer in 3 boxes; enable the first box as shown below.
Step 11: For Keyframes Menu command in After Effects. The most commonly used commands for keyframing are:
- "0" or Space bar to play the motion.
- Shift +Drag using the mouse.
- Ctrl+C and Ctrl+V for copy-pasting the keyframe
- Navigation arrows of the keyboard.
- K and J to move towards the next item in time rules.
- Stopwatch Icon for positioning.
Step 12: To delete 1 or a number of keyframes at once by selecting those by dragging over them and selecting the delete button.
Step 13: To select or adjust keyframes in after effects, we need to identify the keyframe that needs to be adjusted and put the time liner when the keyframe must be moved. It moves left or right from the time liner. Check-in which direction the keyframe must be moved towards the time liner in the below case. I want to move my selected keyframe to the left. So click on the left arrow button the keyframe will be moved on to time linear accordingly.
Conclusion
All the motion graphics editors, title makers, and many others use after effects keyframing to get the tiles or objects on the screen to add motion to them with trimming and location on the frame. We can add position, opacity, motion, volume, audio, timing and many other attributions to enrich the graphics of the video.
Recommended Articles
This is a guide to KeyFrames in After Effects. Here we discuss how to add KeyFrames with step by step explanation and the usage of KeyFrames in After Effects. You can also go through our other related articles to learn more –
- Text Effects in After Effects
- After Effects Tools
- Adobe After Effects Plugins
- After Effects Repeater
How to Add a Keyframe in After Effects
Source: https://www.educba.com/keyframes-in-after-effects/
0 Response to "How to Add a Keyframe in After Effects"
Post a Comment